Printer's Marks - We Don't Need Them
You read that right. 99% of the time, WE DO NOT NEED PRINTER’S MARKS.
Printer’s marks are marks that are added to the area outside the print area of your document for various purposes.
Crop marks show where the job needs to be trimmed.
Bleed marks show the bleed area.
Registration marks are used by the press operator to help line up the different plates that make up a multi-color job.
Color bars help the press operator check for ink densities.
Many design programs have options to include any or all of these marks. However, these programs mostly assume that the job will be printed 1-up (i.e. one instance of the page) on a sheet of paper, which is almost never the case in commercial printing. For example, when printing a book, we print eight pages on a sheet of paper, then fold it down, bind, and trim it. In this process, the marks your design program adds to the page become not only redundant but a positive hindrance.
Our prepress team uses sophisticated imposition software to lay out the pages on the sheet, and this same software adds the printer’s marks relative to the imposed sheet.
So please, save us some time by not including any printer’s marks on your job (we have to remove them) unless we specifically ask you to include them. (If you are using Canva for your design, you will be forced by their export process to include crop marks, so go ahead and include them if you are using that program–see our Canva help page for further instructions.)
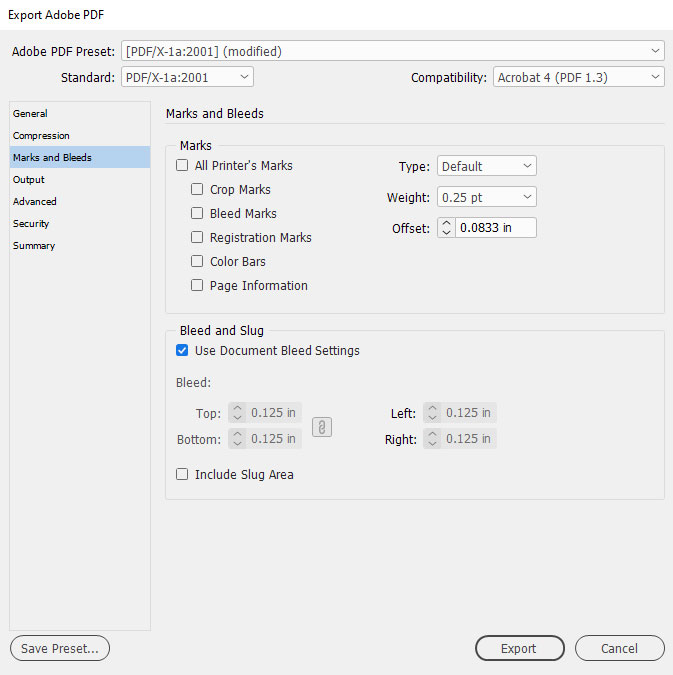
Confused about how to include bleed but NOT printer’s marks?
You’re not alone. Many people struggle with how to include bleed but not printer’s marks. Look at the screenshot below. This is from InDesign, but other programs should have similar options. Basically you need to uncheck all options in the “Marks” section and check the option to include bleed. Sorted!