Bleed: What It Is and Why We Need It
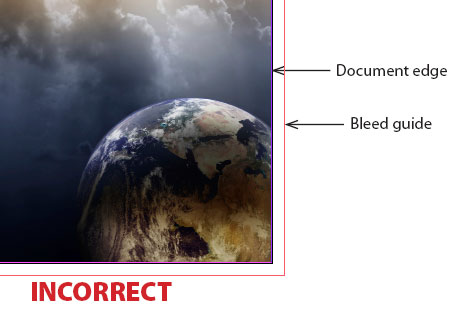
Any time an object (photo, graphic, line, etc.) goes all the way to the document edge, we actually need you to extend it BEYOND the edge of the document by 1/8 inch (0.125). This is a standard requirement in the printing industry. The reason for this requirement is that it’s pretty much impossible, when finally trimming a document after printing, folding, and/or binding, to trim exactly on the document edge. However, if the object extends past the document edge by at least 1/8 inch, that gives us a little margin of error when trimming. If objects stop at the document edge and the document gets trimmed slightly beyond the document edge, there will be a thin white line down the edge of the document. Not good!
So plan ahead: If you know you want certain objects in your document to go all the way to the edge of the paper, you need to plan ahead to allow for bleed. How you do that will depend on what program you are using. Some programs make setting up bleed really easy. Like Adobe InDesign.
Adobe InDesign
Adobe InDesign allows you to set up bleeds as part of the document setup. This can be done either when creating a new document, or after you have already created the document and realize after the fact that your document needs bleed.
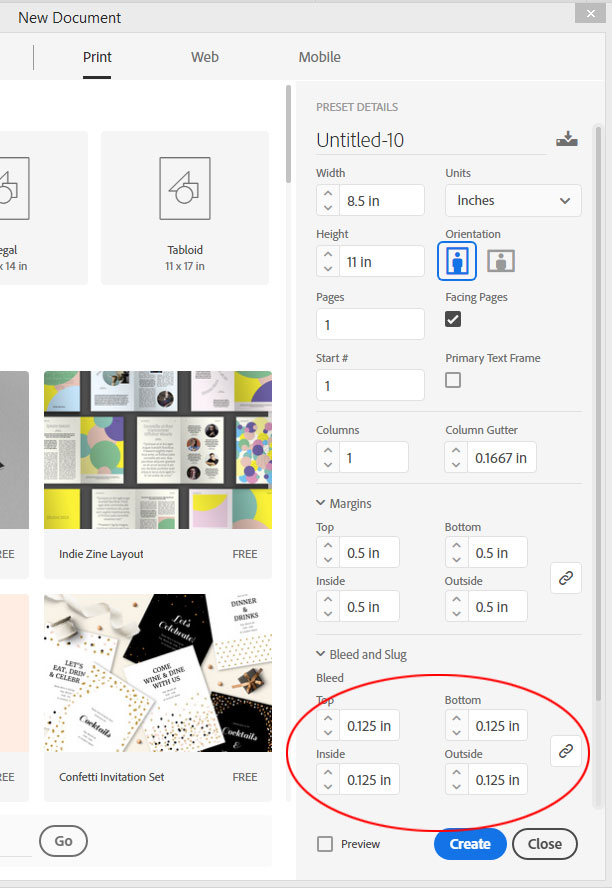
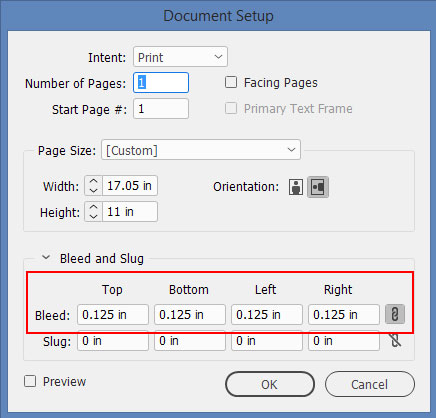
When creating a new document in InDesign, you will be presented with a dialog similar to the one shown below on the left (you will get a dialog similar to the one below on the right when choosing File>Document Setup in an existing document). If you are working in decimal inches, you should use a setting of 0.125. If you are working in picas, you should use a setting of 0p9.
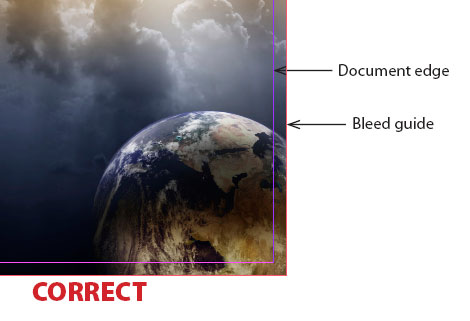
After clicking “Create” in the New Document dialog or “OK” in the Document Setup dialog you will now see a bleed guide around the document edge on every page of your document. Any object that touches the document edge should be moved so that it touches the bleed guide, as shown below.
Important:
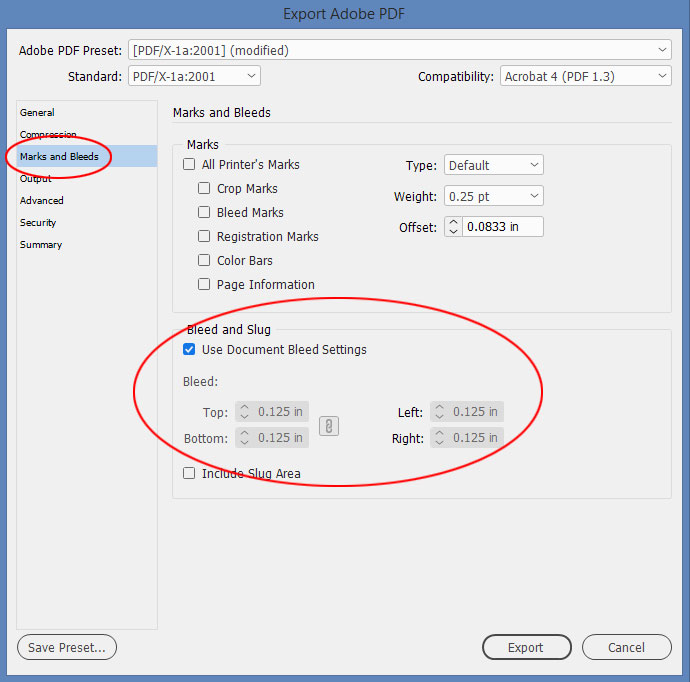
Make sure when you export the document to PDF that you go to the “Marks and Bleeds” tab of the export dialog and check “Use Document Bleed Settings” as shown below. If you miss this critical step when exporting, your final PDF will still not have bleed!
Canva
If you are using Canva to create your document, we have a dedicated help page detailing how to create bleed and then how to export the document to include it. So if you’re using Canva, head on over to our Canva help page.
Other Layout Programs
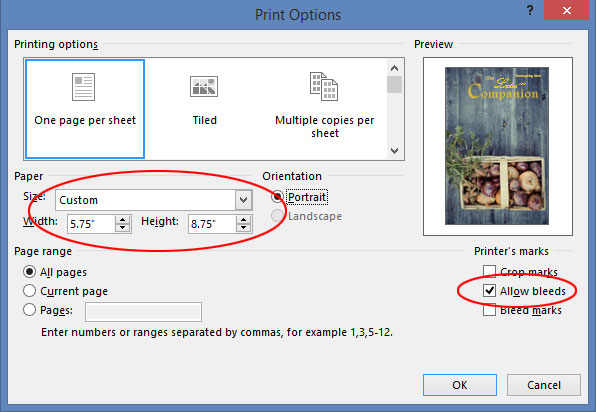
A number of programs, such as CorelDraw and Microsoft Publisher, do not have bleed settings or bleed guides. In the case of CorelDraw, you can create guides around all edges that are 1/8 inch from the document edge, and use these as bleed guides. Publisher is a little more difficult because this program will not allow you to place guides outside the document edge. However, you could create lines using the Line tool and position these 1/8 inch from the document edges to use as temporary bleed guides, and then remove them before exporting the file. If exporting the document to PDF yourself, make sure you export to a page size that will include the items in the bleed area. So for example, if your document is 5.5 by 8.5 inches, the final output size will need to be 5.75 by 8.75 inches in order to accommodate the bleed. Publisher also has an “Allow Bleed” setting in some of its print and PDF export dialogs, which you will need to turn on, as shown below.
Photoshop
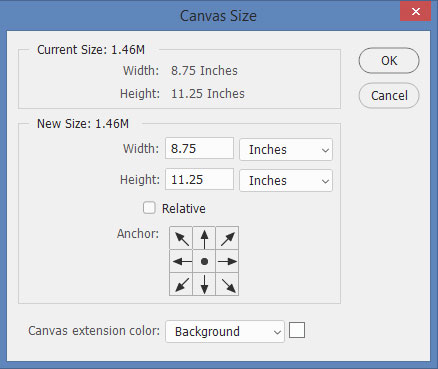
If you have Photoshop, there’s a good chance you have Adobe InDesign also. If so, we highly recommend you put together your final layout in InDesign, not Photoshop, for the reasons mentioned above. However, if you do not have InDesign, or you have a one-page design and you feel more comfortable completing your design in Photoshop, you will need to plan ahead for bleed. To do this, make sure that your “canvas” size is 1/8 inch larger on each dimension than the final trim size of your document. So for example, if your document is 8.5 x 11, your canvas size will need to be 8.75 inches by 11.25 inches. Set the canvas size by going to Image>Canvas Size and choosing Inches as the unit of measurement from the Width and Height dropdowns. Then you can place guides 1/8 inch in from each edge to remind you where the document will be trimmed. See example below.

After reading the above explanations, if you still have questions about bleed that we may not have covered, don’t hesitate to contact us. We’ll be glad to help you.